

Singing Bowls: The Art of Crafting Harmony
Singing bowls have captivated hearts for centuries with their harmonic tones and healing vibrations. There are two main methods used to craft these bowls: the traditional hammering method and the modern moulding technique. In this blog, we’ll take you behind the scenes of the moulding process, showing how raw materials transform into radiant instruments of sound and spirit.
Method 1: The Hammering Technique (Traditional)
The hammering method is the oldest and most traditional way to make singing bowls, and it’s still commonly used today. In this process, several craftsmen work together to shape a flat metal sheet by hammering it repeatedly over a bowl-shaped mold. They continue hammering and bending the edges until the bowl forms smoothly. You can usually tell a hammered singing bowl by the unique hammer marks left on its surface. This method is how most Nepali singing bowls are made.
👉 Explore Hand-Hammered Singing Bowls →
Method 2: The Moulding Technique (Modern)
The moulding method uses a more controlled casting process to form singing bowls. While more modern, this method allows for consistent shapes and often incorporates detailed engravings and deity designs.
Step-by-Step Guide to the Moulded Singing Bowl Process

-
Melting the Metal
In a crucible (a high-temperature melting pot), metal alloys like bronze or brass are heated until they become molten. The glowing orange color shows the metal is at a perfect pouring temperature. This step requires intense heat and great precision. -
Fixing the Mould
The mould, usually made from compacted sand or a heat-resistant compound, is prepared. It has an inner cavity in the shape of the final bowl, often including religious motifs or images (like deities, mantras, or yantras).
Artisans fix the top and bottom halves of the mould to create a sealed container for pouring the metal. -
Pouring the Liquid Metal
The glowing liquid metal is poured into the prepared mould carefully. Pouring too quickly or unevenly can cause imperfections, cracks, or bubbles. Once filled, the metal is left to cool and solidify. -
Breaking the Mould
After cooling, the hardened metal is removed by breaking open the mould, revealing a rough version of the singing bowl inside.
This part is always fascinating-it’s like unearthing a treasure from stone. -
Raw Product Stage
At this stage, the bowl is rough and unfinished. It may contain residues from the moulding material and lacks polish. However, many bowls already display deity engravings or embossed artwork molded into the bowl’s base. -
Fixing Casting Issues
The casting process isn’t always perfect. Air pockets, rough edges, and surface flaws are common. Skilled artisans fix these issues by grinding, welding, or shaping the bowl further to ensure a smooth surface. -
Chiseling the Inner Part
With the raw bowl cleaned, the artisan now begins chiseling the inner surface. This is where spiritual inscriptions or detailing are added. The work requires fine motor skills and patience, especially when carving mantras or deity images. -
Chiseling the Exterior
Once the inner part is complete, artisans start shaping and decorating the exterior surface. This may include etching sacred geometry, mandalas, or borders.
This step defines the bowl’s visual beauty and spiritual essence. -
Polishing the Bowl
The bowl is now hand-polished to bring out its shine. Polishing also helps enhance the acoustic properties, allowing the sound to travel smoothly through the material.
Multiple rounds of sanding and polishing are done to achieve a mirror-like finish. -
Semi-Finished Product
Here, the bowl has taken on a new identity. It is polished, shaped, and refined, but still undergoing final checks.
Sound quality is also tested at this stage - whether the bowl sings smoothly or needs tuning. -
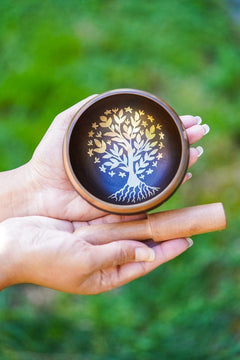
Final Singing Bowl
The result is a gleaming, sonorous singing bowl, ready to be used in meditation, sound healing, rituals, or as décor. Moulded bowls tend to have a more uniform shape, longer sustain, and often more decorative elements than their hammered counterparts.
👉 Explore Molded & Engraved Singing Bowls →
So Which One Should You Choose?
| Feature | Hammered Bowls | Molded Bowls |
|---|---|---|
| Craftsmanship | Hand-hammered, traditional | Cast & carved, modern |
| Visuals | Simpler, visible hammer marks | Highly polished, often engraved |
| Sound | Warm, organic tone | Long sustain, deep resonance |
| Price Range | Often higher due to labor | Can be more affordable |
| Spiritual Preference | Preferred by traditionalists | Popular among collectors & healers |
Every Singing Bowl Tells a Story
At Himalayas Shop, we honor both ancient tradition and modern craftsmanship. Whether you're drawn to the rustic charm of a hammered bowl or the polished beauty of a molded one, our collection has something for every seeker.
Explore All Singing Bowls →
Handmade in Nepal with love, light, and sound.
Leave a comment